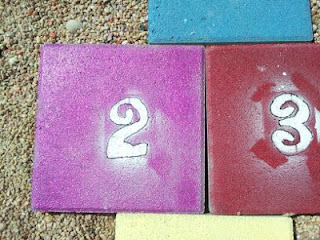
Last summer we collected 16 concrete squares in our dog run. I wanted to use them as some kind of decoration, but just putting them out in the pea gravel in rows was boring. So, this summer we made them into a hopscotch!
Materials Needed:
Concrete squares
Spray paint & primer
Spray sealant
Outdoor puff paint
Stencils
I tried spray painting a few of the squares without first priming them, which was a mistake. The paint seeped into the cement and the color was terrible. After priming each square, I coated the squares several times with spray paint. We had some special glitter spray paint on hand, so a few of the squares were extra sparkly.
After the paint was dry, I taped on number stencils and sprayed the numbers white. Alisen decided which number would go on each color. Obviously, I didn't do a great job of taping around the stencils, as there is a lot of extra white paint outside of the stencil areas:
I let the stones dry overnight, and the next morning traced the numbers with a bottle of black outdoor puff paint. This paint was easy to apply in the squeeze bottle and didn't stick up too far off of the cement. Once again I waited overnight, and then finished the squares by coating them with a clear spray sealant.
We arranged the stones in order from 1-15, with an extra white square being the 'starting line'. This is a project that can easily be extended as far as we want; we might end up with 25+ squares before the kids get bored with the hopscotch. I like that it encourages the kids to use math skills & turn-taking while being active. An added bonus was the colored pea gravel we ended up with, since we had spray painted all of the squares on top of the gravel without a tarp.
Although this project took several days, it was easy and fairly cheap. The kids were excited to help, and they are very proud of their unique game.


